So I wrote a while back about automating SSH jobs in Cron when the keys were passphrase-protected. I was very excited about being able to automate tasks over SSH and I was sure I had it working but a few days later I realized that it wasn't working at all. It was failing without any error I could see.
I'll spare you the gory details of how many hours I spent and how many things I tried when getting it working. The bottom line is that this evening I realized that when my Cron job or script ran "ssh-agent -s" another ssh-agent process was being created! I figured that that command was simply exporting the environment variables necessary for me to use the process created by the Gnome session (you may remember that I have seahorse set to automatically unlock my ssh key when I log in), but instead I was inadvertently creating a new ssh-agent process with no keys in it. Then when I tried to run Unison, it found the wrong ssh-agent process.
To fix it, I needed to find a way to keep from starting another ssh-agent process, and instead gain access to the one seahorse starts every time I log in. I made a change to my crontab that would search for the existing ssh-agent process ID and authentication socket and import them into the cron environment. This is kind of a hack but it actually works (not like last time). Just add the following to your script before trying to connect to your SSH server (or do what I did and put them right into the cron job, separated by semicolons):
export SSH_AGENT_PID=`ps -a | grep ssh-agent | grep -o -e [0-9][0-9][0-9][0-9]`
export SSH_AUTH_SOCK=`find /tmp/ -path '*keyring-*' -name '*ssh*' -print 2>/dev/null`
Showing posts with label cron. Show all posts
Showing posts with label cron. Show all posts
Monday, March 15, 2010
Saturday, February 6, 2010
Using passphrase-protected SSH keys in Cron
Just a few days ago I told you all about the glory that is SSH, and now I want to show you how to automate its use.
I'm sure you noticed while you were setting up your key that it asked you for a passphrase to protect the key. If you opt not to set a passphrase, it will store your key in plain text, which means that if anyone gets access to your filesystem, they have access to your key. They can copy it and use it on any computer to log into your server as you, so you are much better off protecting your key with a passphrase. The key generator will use the passphrase to encrypt your key and give you protection from this threat.
Because the SSH key is encrypted, whenever you want to use it, it will ask you for your passphrase so that it can get access to the key. This is exactly what you want to keep your key secure, but if you want to automate any of your SSH related tasks in Cron, you will be prompted for the passphrase every time SSH tries to establish a connection with your server. One quick, easy way out of this situation is to simply keep your SSH key unencrypted and hope that no one who gets near your computer has malicious intentions, but there's a better way: ssh-agent.
Ssh-agent is a process that stores SSH keys in memory. When you set up your SSH key with a passphrase, you may notice that Gnome gives you the option to "unlock this key automatically when I log in" (Ubuntu offers this option, YMMV); if you select that option, it will use Ssh-agent to store your SSH key in memory.
So at this point you have your SSH key encrypted on disk but unlocked in memory, so you can manually SSH into your server without entering the password for you account on the server or your passphrase for the SSH key, but you want Cron to have the same ability. At this point, any SSH jobs in Cron will prompt you for your passphrase to unlock the SSH key. I will show you how to fix that by making your unlocked SSH key (which is stored in memory by ssh-agent) accessible to Cron.
There are 2 steps involved in making your key available to your script running in the Cron environment: Saving the 2 SSH environment variables to disk and reading them into your environment within your Cron job.
Saving the SSH environment variables
Go into your crontab file by entering "crontab -e" at the command line. Add the following on its own line:
@reboot ssh-agent -s | grep -v echo > $HOME/.ssh-agent
The @reboot is a special token in cron that will cause the command to be run when you first log in. The command will cause the SSH_AUTH_SOCK and SSH_AGENT_PID to be written to a file on disk.
Retrieving the SSH environment variables within a Cron job
Basically, in order to make the running instance of ssh-agent available to your cron job, the following line needs to be run:
. ~/.ssh-agent
On my machine, I put it right into crontab just before the job I wanted to run, like this:
# m h dom mon dow command
30 * * * * . ~/.ssh-agent; unison default -ui text -batch
If you are running a script, you can alternatively put the command at the top of the script.
And that's all there is to it! You should now be able to run an SSH command using an SSH key that is encrypted on disk but unencrypted in memory within a cron job.
EDIT: A few days after posting this, I discovered that it was actually not working for me at all. The steps I just described probably would have worked just fine if I was trying to start my own ssh-agent process and manually add keys to it using ssh-add, but I was trying to do it using the ssh-agent process and key which seahorse sets up for me when I first log in, and this configuration required a slightly different solution. See my follow-up post for details.
See also: http://sial.org/howto/openssh/publickey-auth/
Sunday, January 10, 2010
Unify your files with Unison
If you are using multiple computers, you must have some way of keeping the files you want on each machine. A lot of people use Dropbox or LiveMesh, and Canonical recently threw its hat into the ring with UbuntuOne, but all of these solutions provide a pretty small amount of storage (2 gigs in the case of Dropbox and UbuntuOne), and as with any online storage solution they also require that you trust them not to lose your data and to respect your privacy.
Because I prefer not to trust anyone with my data unless I have to, and partly because I'm a cheapskate, I prefer the DIY approach. This is where Unison comes in.
Unison Explained
Unison is a file synchronization utility that keeps the contents of two directories synchronized. In true Unix fasion, it doesn't reinvent the synchronization wheel, instead it uses rsync to do the comparison and synchronization, effectively making a tool that could only handle one-way synchronizations capable of handling two-way synchronizations. In addition to being able to sync local directories, it can also operate over SSH, so you don't have to spend a bunch of time worrying about providing unison a protocol or dedicated port, or setting up a dedicated authentication mechanism.
Like all great Linux utilities, Unison has a graphic user interface but can also be used on the command line (this is important for automating synchronizations in cron; more on that later). Either way, you are going to manage Unison tasks with Profiles. Profiles are basically a set of two folders that you are syncing (one local, the other local or remote), and zero or more options, and although they can get rather elaborate, don't let it scare you. The Unison GUI makes the task of creating a new profile simple.
Creating Unison Profiles
After you've installed Unison (on Ubuntu use "sudo apt-get install unison unison-gtk"), fire it up from your menu or by typing "unison-gtk" into the command line. You will be greeted with a screen where you can type in the name of your first "root", or local directory. When you are finished with that, hit OK and then you will be promted to enter the second directory. This screen will give you the option to connect to a remote machine over SSH or a raw socket (not recommended). If you decide to sync with another machine over SSH, be sure to type in the absolute path to the folder on that machine (i.e. "/home/jizldrangs/documents"). Fill in the host name, username to connect as, and port name as necessary, then hit OK and you're done! Unison will take this information and create a new profile called "default". You can create new profiles the next time you launch the Unison GUI
The GUI will help you set up a profile and will allow you to set some of the basic options, but if you want to use any of the more advanced features (see the Unison man page for a list), you will need to edit the profile by hand. Your profiles are stored in separate files in the .unison directory in your home directory (e.g. /home/jizldrangs/.unison; it is a hidden directory). In that folder you will see a file for each of your profiles, all ending with ".prf". Simply open the profile you want and start adding options. You can do things like exclude certain file types, exclude certain directories, exclude files over a certain size, have it follow links, etc.
I already have an old Pentium 3 laptop recommissioned as our file and print server, and it runs all the time, so it was the perfect place to store the master copies of all my files, and to receive updates from whichever of my computers I make changes on and distribute them to the rest of the machines, all within the security and ease of SSH.
To make sure that I have the latest version of my files, I've tasked Cron, my personal Linux butler, with the task of running the sync at the bottom of every hour. Here is the relevant line from my crontab file:
# m h dom mon dow command
30 * * * * unison default -ui text -batch
The "ui text" option tells unison to use command-line mode and not to launch the gui, and the "batch" option tells it to accept default update options (basically, replace older files with newer files), so it doesn't prompt me for input on what to do with the files. Now my file syncing is totally automated.
Unison Gotchas
If you are syncing files to an mp3 player or usb flash drive, add the option "perms = 0" to avoid getting the error "failed to set permissions" when you try to sync.
Happy syncing!
Saturday, November 14, 2009
Meet my personal Linux butler, Cron
I'm a busy man (who isn't?), so I find it important to be able to automate as many tasks as possible. That's why I have a personal Linux butler, Cron. Cron is the unix scheduler, and it has saved me a bunch of time by taking care of my backups, checking for updates, podcast aggregation, and file synching for me.
There are a lot of great tutorials on how to use Cron out there; I learned on Chess Griffin's fantastic but now-defunct Linux Reality podcast (which I highly recommend if you're just starting with Linux).
Cron offers a lot of choices as to when jobs are run. You can have it run a job every minute, every third hour, at 4:15 in the morning on the second Saturday of the month. And since the Linux command line is so powerful, almost any task can be scripted, which makes Cron a viable option for almost any repetative task.
So any time you run up against some task that you find boring but feel the need to do every so often so that you don't fall behind, consider asking your personal Linux butler to take care of it for you.
Getting Cron to provide you with feedback, such as when updates are available, is another matter that I will discuss later...
Thursday, November 12, 2009
Update Notifications in Crunchbang
I've been running Crunchbang for just over a week now and I'm loving it. The slimmed-down, speedy configuration suits me perfectly.
There is one thing that we took for granted in Ubuntu that is sadly lacking in Crunchbang: update notifications. When updates are available in Ubuntu, you get an icon in the system tray or a window that pops up informing you that it is time to update. In Crunchbang, you're on your own when it comes to knowing when, or even remembering, to update.
Fortunately you've all met my personal Linux butler, Cron, and this is a perfect job for him. We could just have "apt-get update; apt-get upgrade" run every day, and all updated packages would be downloaded and installed without you having to lift a finger. I'm sure this will be the way many people prefer to do things, but I like to have a little more control than that. I like to have the final say as to what software is installed on my computer, so I would rather be notified when updates are available.
To accomplish this I am going to set up 2 cron jobs: one for the root account and one for my user account. In a terminal, run "sudo crontab -e" and enter the following line:
45 * * * * apt-get update; apt-get -s upgrade | grep -c ^Inst > /var/cache/apt/number-of-updates
This line runs every hour on the 45s and updates the apt-get database, then it does an upgrade with the -s option, which "simulates" the upgrade, meaning that it doesn't actually do the upgrade but it displays the text as though it did. This text is piped through grep, which searches for the "Inst" string at the beginning of the line (which indicates that a package is to be installed by the upgrade). The -c option tells grep to output the number of matches, which is stored in the text file located at /var/cache/apt.
Don't forget to create the text file and give all users read permissions to it:
sudo touch /var/cache/apt/number-0f-updates
sudo chmod 644 /var/cache/apt/number-of-updates
Thus far we have a way of getting the number of updates available saved to a text file. Now we need to display the number using the dbus notification system. This is going to require several lines of bash commands, so we will need to create a script to call from cron. Open a new text file and insert the following into it:
#! /bin/sh
NumOfUpdates=$( cat /var/cache/apt/number-of-updates )
if [ $NumOfUpdates != "0" ]; then
notify-send -u normal -t 5000 -i info "System Updates" "There is/are ${NumOfUpdates} update(s) available"
fi
This short bash script reads the number of available updates from the file specified above, and if the number is not 0, it uses notify-send to display a notification in the corner of your screen for 5 seconds. Go ahead and run it using "sh file-name" if you want to see the notification (note: notify-send is installed by default on Crunchbang but it wasn't installed by default in Ubuntu last time I checked; you will have to install the package bnotify-bin" if it isn't already installed).
Save it somewhere you will remember. Now go into your own cron config file by typing "crontab -e" and enter the following:
30 * * * * sh /path-to-your-script/script-file-name
If we were to save this change, cron would not be able to display the notification. That's because cron does not have a handle to the current display, so when notify-send tries to display the notification, it doesn't have a display to show it on and the notification is lost in the ether. This is easy to fix by making sure we set the appropriate environment variables before saving the crontab file. At the top of the crontab file, insert the following:
USER=yourr-user-name
HOME=/home/your-user-name
SHELL=/bin/sh
DISPLAY=:0.0
MAILTO=your-user-name
PATH=/sbin:/bin:/usr/sbin:/usr/bin:/home/your-user-name/bin
There is a chance that not all of these variables are actually used, but I like to include them anyway; there's no reason not to. As an example, here is the entire contents of my crontab file:
USER=jizldrangs
HOME=/home/jizldrangs
SHELL=/bin/sh
DISPLAY=:0.0
MAILTO=jizldrangs
PATH=/sbin:/bin:/usr/sbin:/usr/bin:/home/jizldrangs/bin
# m h dom mon dow command
30 * * * * sh /home/jizldrangs/bin/notify-updates
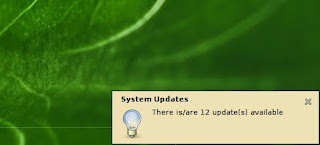
Save your crontab file and you're done! Now whenever updates are available you will get a notification in the corner of your screen that looks something like this:
There is one thing that we took for granted in Ubuntu that is sadly lacking in Crunchbang: update notifications. When updates are available in Ubuntu, you get an icon in the system tray or a window that pops up informing you that it is time to update. In Crunchbang, you're on your own when it comes to knowing when, or even remembering, to update.
Fortunately you've all met my personal Linux butler, Cron, and this is a perfect job for him. We could just have "apt-get update; apt-get upgrade" run every day, and all updated packages would be downloaded and installed without you having to lift a finger. I'm sure this will be the way many people prefer to do things, but I like to have a little more control than that. I like to have the final say as to what software is installed on my computer, so I would rather be notified when updates are available.
To accomplish this I am going to set up 2 cron jobs: one for the root account and one for my user account. In a terminal, run "sudo crontab -e" and enter the following line:
45 * * * * apt-get update; apt-get -s upgrade | grep -c ^Inst > /var/cache/apt/number-of-updates
This line runs every hour on the 45s and updates the apt-get database, then it does an upgrade with the -s option, which "simulates" the upgrade, meaning that it doesn't actually do the upgrade but it displays the text as though it did. This text is piped through grep, which searches for the "Inst" string at the beginning of the line (which indicates that a package is to be installed by the upgrade). The -c option tells grep to output the number of matches, which is stored in the text file located at /var/cache/apt.
Don't forget to create the text file and give all users read permissions to it:
sudo touch /var/cache/apt/number-0f-updates
sudo chmod 644 /var/cache/apt/number-of-updates
Thus far we have a way of getting the number of updates available saved to a text file. Now we need to display the number using the dbus notification system. This is going to require several lines of bash commands, so we will need to create a script to call from cron. Open a new text file and insert the following into it:
#! /bin/sh
NumOfUpdates=$( cat /var/cache/apt/number-of-updates )
if [ $NumOfUpdates != "0" ]; then
notify-send -u normal -t 5000 -i info "System Updates" "There is/are ${NumOfUpdates} update(s) available"
fi
This short bash script reads the number of available updates from the file specified above, and if the number is not 0, it uses notify-send to display a notification in the corner of your screen for 5 seconds. Go ahead and run it using "sh file-name" if you want to see the notification (note: notify-send is installed by default on Crunchbang but it wasn't installed by default in Ubuntu last time I checked; you will have to install the package bnotify-bin" if it isn't already installed).
Save it somewhere you will remember. Now go into your own cron config file by typing "crontab -e" and enter the following:
30 * * * * sh /path-to-your-script/script-file-name
If we were to save this change, cron would not be able to display the notification. That's because cron does not have a handle to the current display, so when notify-send tries to display the notification, it doesn't have a display to show it on and the notification is lost in the ether. This is easy to fix by making sure we set the appropriate environment variables before saving the crontab file. At the top of the crontab file, insert the following:
USER=yourr-user-name
HOME=/home/your-user-name
SHELL=/bin/sh
DISPLAY=:0.0
MAILTO=your-user-name
PATH=/sbin:/bin:/usr/sbin:/usr/bin:/home/your-user-name/bin
There is a chance that not all of these variables are actually used, but I like to include them anyway; there's no reason not to. As an example, here is the entire contents of my crontab file:
USER=jizldrangs
HOME=/home/jizldrangs
SHELL=/bin/sh
DISPLAY=:0.0
MAILTO=jizldrangs
PATH=/sbin:/bin:/usr/sbin:/usr/bin:/home/jizldrangs/bin
# m h dom mon dow command
30 * * * * sh /home/jizldrangs/bin/notify-updates
Save your crontab file and you're done! Now whenever updates are available you will get a notification in the corner of your screen that looks something like this:

Subscribe to:
Posts (Atom)